

I bought a small birdhouse for my apartment, which you can hang in front of the window. When the first birds came and you watch them eat fascinated, I wanted to photograph them. So grabbed my camera, took photos, and quickly noticed that in the period of 10 minutes felt always the same sat in front of the lens. However, since I was sure that there were other birds in the home garden, I wanted to see them too. Because of the time aspect, however, I did not like to sit and wait for 12 hours with the camera in front of the window.
I had already equipped a camera of the Raspberry Pi with face recognition, so it recognized me and displayed my calendar on a screen. This made me think back to that and whether I could integrate object recognition for birds in such a way that it always takes a photo when a bird is recognized.
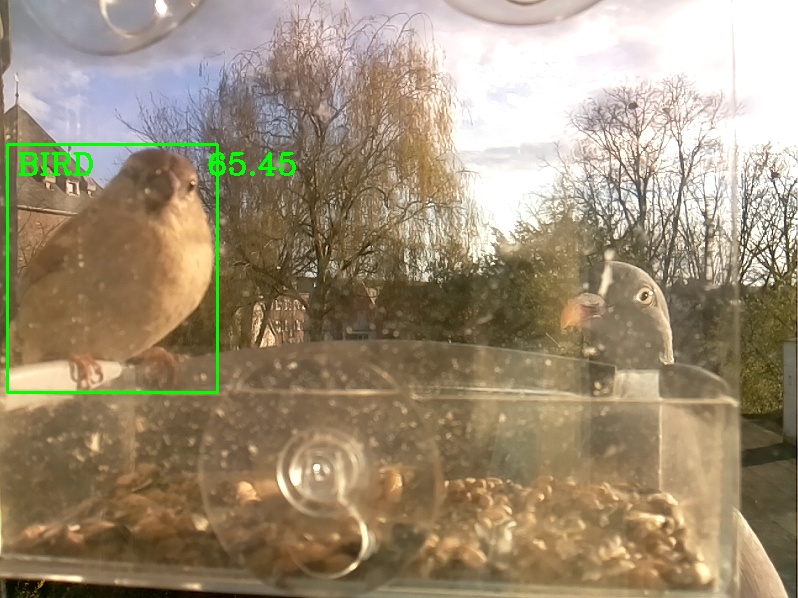
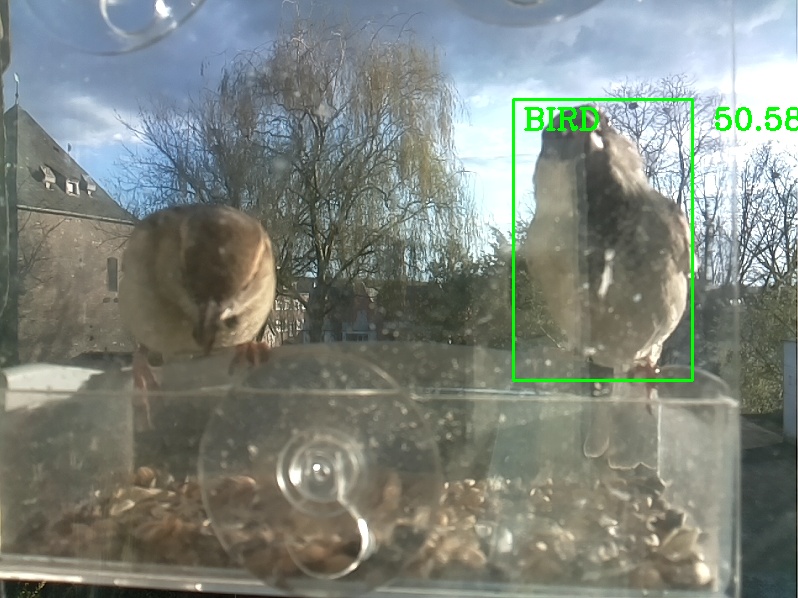
The first result of my work in my backyard you can see here:

After the first research, my choice fell on Open-CV for object recognition. This must first be set up on the Raspberry Pi and then a ZIP can be downloaded from the following page, which contains the object identifier, which we will rewrite later so that pictures are taken when birds are detected.
https://core-electronics.com.au/guides/object-identify-raspberry-pi/#Set[/embed]
Materials needed
- Raspberry Pi (3 b+ or 4)
- Camera Module for Raspberry Pi
Activate the camera on Raspbian software
- Before we begin, the camera interface must first be enabled in the operating system. To do this, perform the following steps in the console:
sudo raspi-config
// 3 - Interface Options
// 1 - Camera - Enable
Setting up Open-CV on the Raspberry Pi:
As already mentioned, we use an Open-CV based script.
OpenCV is a free program library with algorithms for image processing and computer vision. It is written for different programming languages and is available as free software. In our case, we will use a Python script later.
To set up open-cv on your Raspberry Pi, the following steps must be performed via the console:
sudo apt-get update && sudo apt-get upgrade
sudo nano /etc/dphys-swapfile
// In this file you have to change "CONF_SWAPSIZE = 100" to "CONF_SWAPSIZE=2048" and save this with Ctrl + S and close it with Ctrl + X afterwards.
// Afterwards we continue with:
sudo apt-get install build-essential cmake pkg-config
sudo apt-get install libjpeg-dev libtiff5-dev libjasper-dev libpng12-dev
sudo apt-get install libavcodec-dev libavformat-dev libswscale-dev libv4l-dev
sudo apt-get install libxvidcore-dev libx264-dev
sudo apt-get install libgtk2.0-dev libgtk-3-dev
sudo apt-get install libatlas-base-dev gfortran
sudo pip3 install numpy
wget -O opencv.zip https://github.com/opencv/opencv/archive/4.4.0.zip
wget -O opencv_contrib.zip https://github.com/opencv/opencv_contrib/archive/4.4.0.zip
unzip opencv.zip
unzip opencv_contrib.zip
cd ~/opencv-4.4.0/
mkdir build
cd build
cmake -D CMAKE_BUILD_TYPE=RELEASE \
-D CMAKE_INSTALL_PREFIX=/usr/local \
-D INSTALL_PYTHON_EXAMPLES=ON \
-D OPENCV_EXTRA_MODULES_PATH=~/opencv_contrib-4.4.0/modules \
-D BUILD_EXAMPLES=ON ..
make -j $(nproc)
// This command will take several hours.
// Check in between to see if it is still running, it is not uncommon for the program to crash several times.
// If this happens, restart the command and don't worry, the progress so far will be carried over.
// Eventually it will run through and you can continue.
sudo make install && sudo ldconfig
sudo reboot
// After finishing the setup you can change the swapfile again:
sudo nano /etc/dphys-swapfile
// change the "CONF_SWAPSIZE = 2048" to "CONF_SWAPSIZE=100" and save and close.
Now that we have set up Open-CV we can finally get to the actual Python script. We change only one small part of the script with an if-query.
As mentioned at the beginning, we use the Object_Detection_Files, which can be downloaded here. After the Index is unpacked on the desktop of the raspberry pi, we use the code “object-ident-2.py” in the directory and change it. It is important that you unpack the directory on the desktop, otherwise, complications can occur by linking the source code.
The changes look like this:
if bird_detected: // Here it is checked whether a bird was recognized. If yes, the photo is saved.
    filename = "bird_detected_{}.jpg".format(i)
    cv2.imwrite(filename, img[1:-1,1:-1,:])
    bird_detected = False
    i += 1
The complete code is:
import cv2

#thres = 0.45 # Threshold to detect object

classNames = []
classFile = "/home/pi/Desktop/Object_Detection_Files/coco.names"
with open(classFile,"rt") as f:
    classNames = f.read().rstrip("\n").split("\n")

configPath = "/home/pi/Desktop/Object_Detection_Files/ssd_mobilenet_v3_large_coco_2020_01_14.pbtxt"
weightsPath = "/home/pi/Desktop/Object_Detection_Files/frozen_inference_graph.pb"

net = cv2.dnn_DetectionModel(weightsPath,configPath)
net.setInputSize(320,320)
net.setInputScale(1.0/ 127.5)
net.setInputMean((127.5, 127.5, 127.5))
net.setInputSwapRB(True)
bird_detected = False


def getObjects(img, thres, nms, draw=True, objects=[]):
global bird_detected
    classIds, confs, bbox = net.detect(img,confThreshold=thres,nmsThreshold=nms)
#print(classIds,bbox)
if len(objects) == 0: objects = classNames
    objectInfo =[]
if len(classIds) != 0:
for classId, confidence,box in zip(classIds.flatten(),confs.flatten(),bbox):
            className = classNames[classId - 1]
if className in objects:
                objectInfo.append([box,className])
if (draw):
                    cv2.rectangle(img,box,color=(0,255,0),thickness=2)
                    cv2.putText(img,classNames[classId-1].upper(),(box[0]+10,box[1]+30),
                    cv2.FONT_HERSHEY_COMPLEX,1,(0,255,0),2)
                    cv2.putText(img,str(round(confidence*100,2)),(box[0]+200,box[1]+30),
                    cv2.FONT_HERSHEY_COMPLEX,1,(0,255,0),2)
if className == 'bird':
                    bird_detected = True

return img,objectInfo


if __name__ == "__main__":

    cap = cv2.VideoCapture(0)
    cap.set(3,800)
    cap.set(4,600)
#cap.set(10,70)
    i = 0

while True:
        success, img = cap.read()
        result, objectInfo = getObjects(img,0.45,0.2, objects=['bird'])
#print(objectInfo)
if bird_detected: // Here it is checked whether a bird was recognized. If yes, the photo is saved.
            filename = "bird_detected_{}.jpg".format(i)
            cv2.imwrite(filename, img[1:-1,1:-1,:])
            bird_detected = False
            i += 1

# Display image
        cv2.imshow("Output", result)
        cv2.imshow("Output",img)
        cv2.waitKey(1)
With this change, whenever a bird is detected, a picture will be saved to the unzipped Object_Detection_Files folder. So all you have to do now is to set up the camera somewhere, and run the code via the console for example:
cd Desktop
cd Object-Identifier-files
python Object-ident-2
Now an output window should open where you can see the live stream. Depending on which raspberry pi you are working with, it might be a little bit slow or delayed, but this is not that important anymore, because we don’t want to watch the live stream, but save all the images we want to see.
Have fun building your own automatic bird camera and watching your home birds. Below are a few sample images of my Garden.
If you have any questions, feel free to contact me. If you like my work, feel free to check out my other articles on similar topics.
Schreibe einen Kommentar