
At some point in my childhood, I was given an Arduino as a gift. At some point, however, I read about the Raspberry Pi and the further possibilities it would give me. One of my first and favorite projects was to build my own MagicMirrors. For me, this had something incredibly fascinating about it, and is now known worldwide in the field of smart homes and the DIY scene.
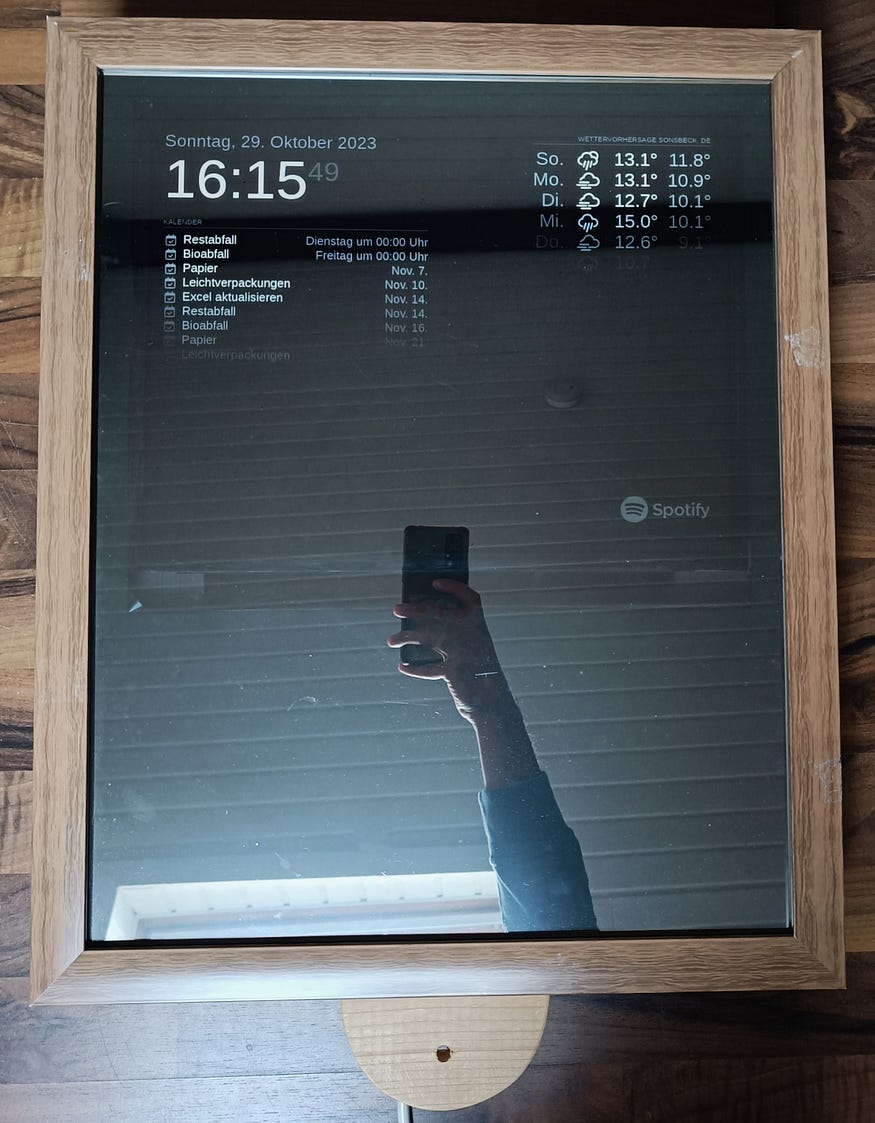
A MagicMirror not only reflects your image but also provides a wealth of useful information and functionality. Inspired by the MagicMirror project created by Michael Teeuw (MichMich), I embarked on a journey to build my very own MagicMirror. This article will take you through the detailed steps I followed to create this magical addition to my home.
Hardware:
Before we dive into software installation, let’s ensure you have all the essential hardware components ready. You will need:
- Raspberry Pi 4
- A monitor: The mirror surface of your MagicMirror.
- Wooden Frame: For a rustic and sturdy structure.
- A one-way mirror or acrylic mirror sheet with a normal glass pane: To serve as a reflective surface.
The Hardware Assembly
Now, let’s take a closer look at the hardware assembly of your MagicMirror:
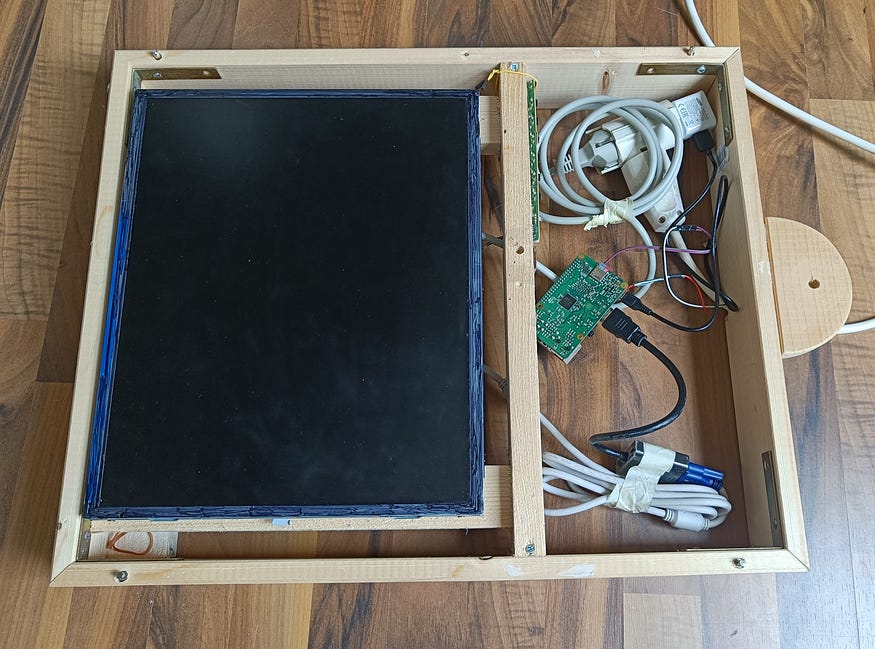
Wooden Frame:
Craft a wooden frame that fits your mirror and monitor. Pine wood is a popular choice for its cost-effectiveness and ease of workability. The design and dimensions are entirely up to your personal preferences, but ensure enough space for your monitor and Raspberry Pi.
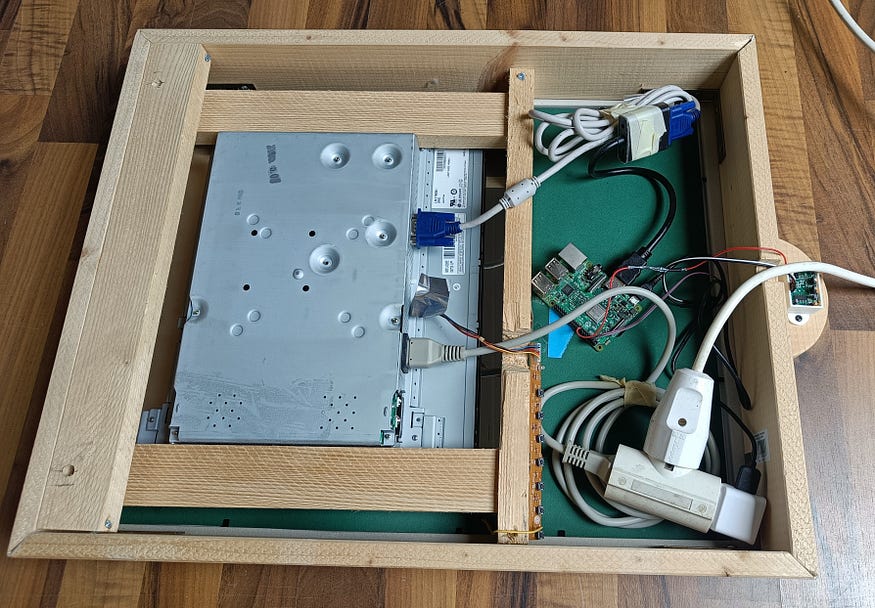
Monitor Integration:
Place your monitor within the wooden frame, behind the mirror surface. Ensure that the mirror reflects the screen when the monitor is powered on. You may need to secure the monitor in place using brackets or screws.
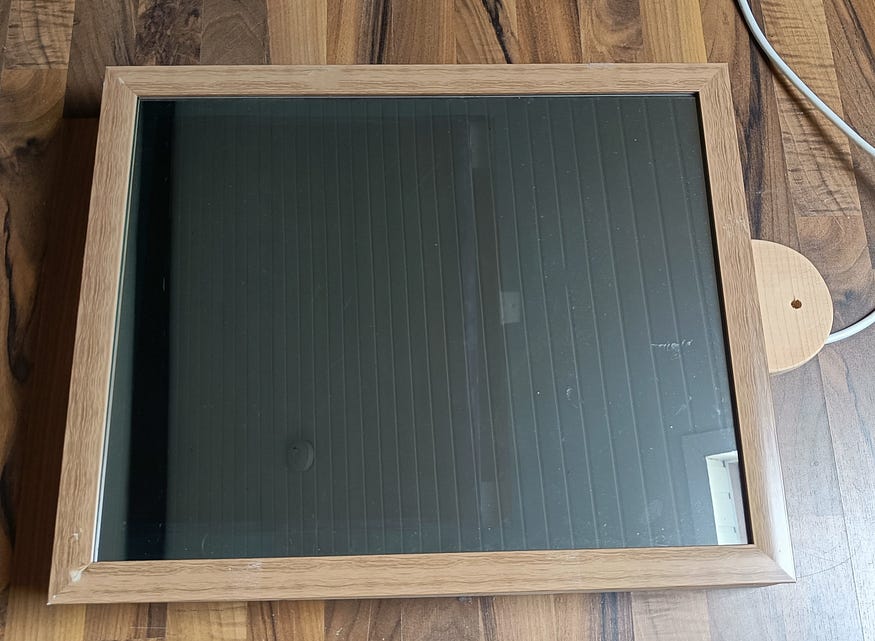
Mirror Surface:
Attach a one-way mirror or acrylic mirror film to the front of your wooden frame. This mirror surface will allow the MagicMirror software to shine through while still functioning as a reflective surface. I simply used a purchased picture frame, pasted the glass with a mirror film and attached it to the wooden frame.
Software
The heart and soul of any MagicMirror project is the software, and MichMich’s MagicMirror² is a fantastic open-source platform designed specifically for this purpose. Here’s how you can set up the software on a Raspberry Pi:
Prepare the Raspberry Pi:
Start by installing an operating system on your Raspberry Pi. Raspberry Pi OS is a great choice for this project. How to set up a Raspberry for the first time described in my article “First Set Up Your Raspberry Pi with Remote Control”.
Install MagicMirror²:
Once your Raspberry Pi is up and running, you must install the MagicMirror² software. Here’s how:
- Open a terminal on your Raspberry Pi and navigate to your home directory.
- Use the following command to download and install MagicMirror²:
bash -c „$(curl -sL https://install.magicmirror.builders)“
- Follow the on-screen prompts to configure your MagicMirror according to your preferences. You can choose the modules you want to display, and their layout, and even customize the look of your MagicMirror.

Customization
With the major components in place and the additional modules configured, it’s time to give your MagicMirror those finishing touches. You can customize the appearance of your MagicMirror by selecting from a wide array of pre-built widgets and modules available on the MagicMirror website. These modules can display the time, date, weather forecast, news, and much more. Personalize your mirror to meet your specific needs and aesthetics.
If the default modules do not meet your requirements, you can choose from a wide range of third-party modules. These modules provide a variety of information and features that you can add to your MagicMirror. Here’s how to add new modules:
Visit the MagicMirror website and search the “Modules” section for modules that meet your needs.
Follow the installation instructions for the selected module. This usually involves downloading the module to the ~/MagicMirror/modules directory and updating your configuration file to enable the module.
Additional Modules
To add extra functionality to your MagicMirror, consider these two modules. I will describe exactly how this works in detail in a future article.
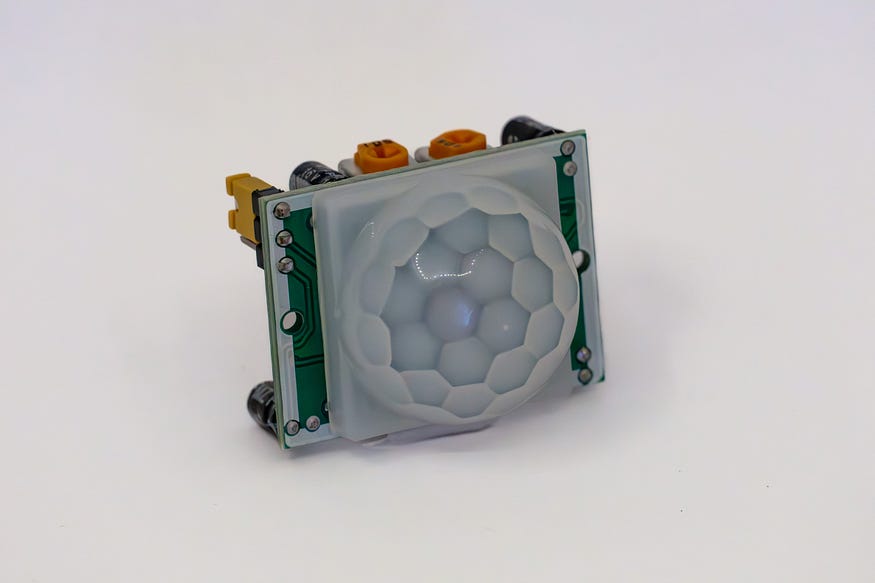
Motion Detector:
A motion detector is a valuable addition to your MagicMirror setup. It helps conserve energy by turning the display off when no one is in the room and turning it back on when motion is detected. I will describe exactly how this works in detail in a future article.
Face Recognition:
Adding face recognition to your MagicMirror can be a fun and useful feature. Configure it to display your personal Google Calendar on the mirror whenever it recognizes your face.
If you are an advanced user and want to implement your ideas, you can also create your own MagicMirror modules. This requires programming skills in HTML, CSS, and JavaScript. You can use the MagicMirror API and documentation to develop your modules and customize them exactly as you want.
Conclusion
With these options for customizing and extending MagicMirror modules, you can design a mirror that not only reflects your reflection but also provides customized information and features to suit your personal needs. From news and weather forecasts to personal calendars and traffic info, you can design your MagicMirror the way you want it. The customization options are virtually unlimited, and your creativity knows no bounds.
Building a MagicMirror from MichMich’s MagicMirror² project is an exciting and rewarding endeavor that combines technology, craftsmanship, and design to create a functional yet stylish addition to your home. By following the provided hardware and software instructions, you can craft your magical portal to the digital world, reflecting both your image and your personality. Explore the resources provided on the MagicMirror website, and let your imagination run wild as you create your very own MagicMirror masterpiece.
Schreibe einen Kommentar