
After creating and printing a Lithophane in my article “How to Create a Lithophane with 3D Printing”, I will present you a case that acts as a backlight for the Lithophane. Making it should be suitable even for beginners who have no experience in soldering.
Materials needed are: (Products I recommend)
- PLA Filiament (e.g. wood optics)
- LED Strip
- Cable
- 9V battery adapter/connector
- On/Off switch
Idea
After creating a Lithophane, it is always nice to hold it in front of a light source to look fascinated at the change. Sometimes it stands however only on a cabinet in the room around and takes it even more rarely in the hand around it before a light to hold. If it’s not in front of a window, it’s less and less likely to show off the full glory of a Lithophane. To change this, a backlight was needed that is not as conspicuous as a classic lamp directly behind it and also looks nice.
This inspired me to create a design for a housing with an integrated backlight in Fusion 360.
Adapting the housing to the image
As can be seen from the housing, an outer curved Lithophane is used again. After deciding on an image and printing it, the dimensions of the housing must be taken over so that it can be inserted exactly into the holder provided for it.
In this case, the image was exactly 167 mm wide and 116 mm high. The finished case can then be printed in one.

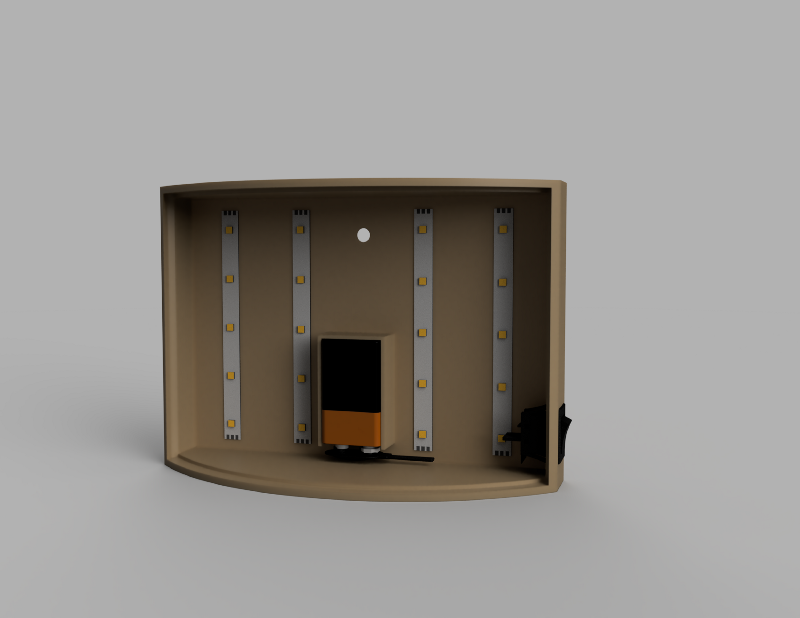
In the design, I made sure that all electronic parts fit without affecting each other. This was especially important for the battery, as it could block the light and cause darker areas in the housing. The light is projected evenly onto the Lithophane by spacing the LED strips evenly.
On the side, I left a recess for the on and off switch linked in the upper area, so that this is only pushed in and anchored there without glue or the like.
Electronics
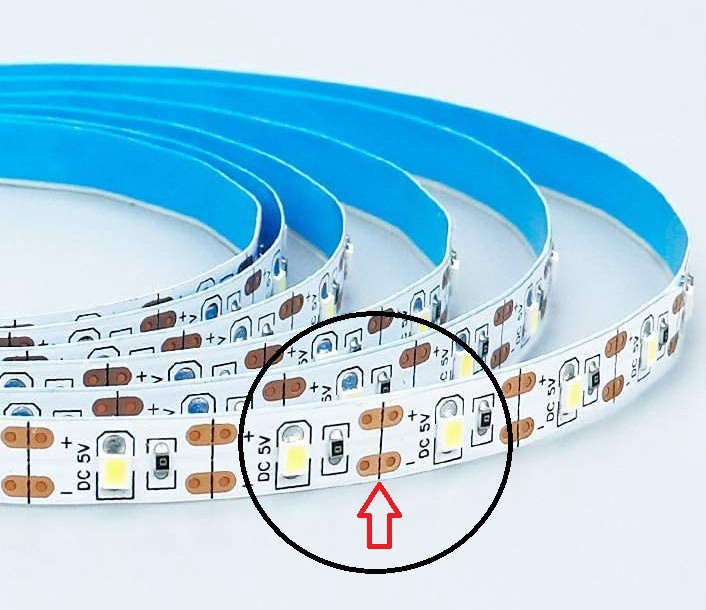
The electronics for this project are very simple. LED strips are usually made so that each LED can be operated individually. Therefore, the LED strips can be cut to fit exactly, so that you get 4 strips of equal length. It is important that you cut the LED strips exactly in the middle between the contacts to be able to connect them again with cable.
Then place the LED strips next to each other and connect them again with cables minus to minus and plus to plus. The minus end of the LED strip must then be connected to the battery and the plus end to the on/off switch, which leads to the battery. The entire circuit is shown below.

Result
After installing the electronics in the case, it is finally possible to insert the Lithophane. Now when you press the switch, the Lithophane appears in full illumination and can be used in an even better way as a decoration or gift.
I hope you enjoyed this tutorial and wish you a lot of fun creating your own housing with backlight for your Lithophanes. If you are interested in Lithophanes read my article “How to Create a Colorful Lithophane”.
If you have any questions, feel free to contact me.
Schreibe einen Kommentar