
Whether as a WOW moment in your own decoration or as a gift for friends and family, a Lithophane is always an eye-catcher.
A Lithophane is a thin, slightly translucent layer of material (usually white PLA in 3D printing). When a Lithophane is illuminated from behind by a light source, the whole effect unfolds and the representation of the e.g. image becomes visible. Due to the different thicknesses of the material layer, light and dark areas are created, which produce a special image effect.
To make a Lithophane only two things are needed, a 3D printer and white PLA. I use the filiament from Geetech, which I can highly recommend.
Image selection
The first thing to do is to make sure that the image you want to use is also good as a Lithophane. Not every image is equally suitable. Many factors such as brightness, contrast, or colors are important.
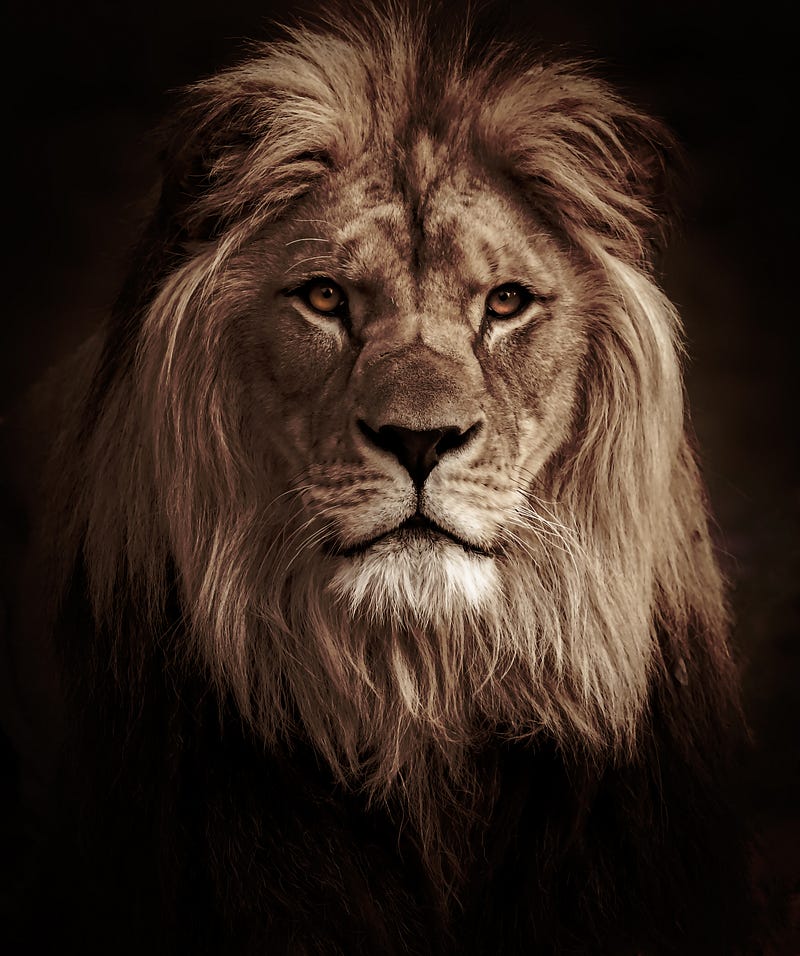
An image should have high contrast and many clear lines or edges. In addition, the strongest possible differences in brightness or color contrasts are advantageous. A person with a white T-shirt and light pants will not be well recognizable against a white background and will disappear in the background.
To illustrate the whole process, in the next steps I will create a Lithophane using the following image.
Convert an image to a printable STL File
After the image is selected, it must be converted into a printable Lithophane. This is done online via a website where the image is uploaded, converted, and then exported as an STL file.
The website to use is: https://3dp.rocks/lithophane/
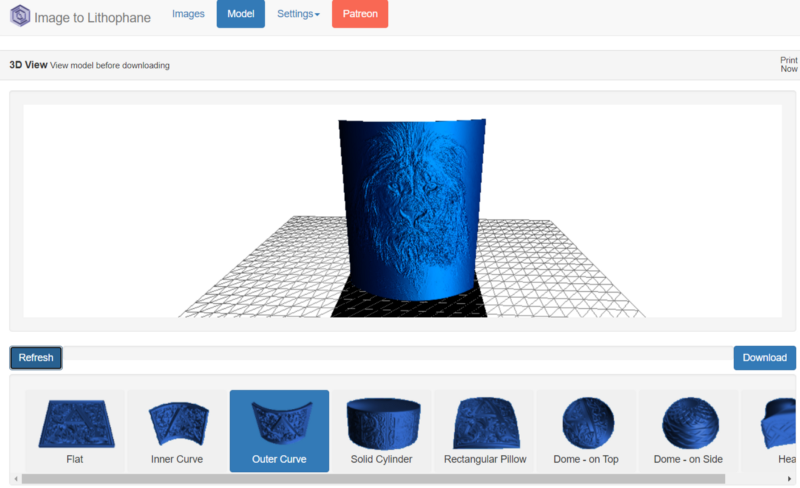
After you have uploaded the image under Images, you will see the first preview under Model. You can now select different shapes in the lower area. Shapes like a cylinder, curved, or even heart-shaped can be selected.
By pressing the refresh button, the preview is updated accordingly.
For this example and also from experience, the Outer Curve is very suitable for printing, because it can stand on its own due to the bending and can be printed vertically.
The result should look like the following image.
Finally, important properties of the Lithophane can be changed in the Settings section.
The following are explanations of the individual settings:
Maximum Size (MM):
- Specifies the maximum length of the longest side.
- Important: it is not always the height (like in the example)! → For a wide image, this is the width of the image.
Thickness (MM)
- Here you can set the thickness of the whole Lithophane, important is, the thicker the Lithophane, the more brightness contrasts and therefore details are possible. With a very dark image, however, you should not set the Lithophane too thick, otherwise, details can be lost.
Border (MM):
- Here you can set a border around the image to create another interesting look.
Thinnest Layer (MM):
- This setting specifies how thin the image may become in the thinnest part of the image to show bright parts of the image. It is important not to set this setting too low, otherwise gaps may appear in the print during conversion where the Lithophane is too thin for 3D printing.
Vectors per pixel:
- In this setting, you can indirectly set the quality of the conversion. 1 Vector per Pixel, means that the gradation between light and dark is fairly direct, a higher Vector per Pixel in turn produces a smoother transition.
- I usually leave this setting at 4 for my FDM prints, since a higher quality is hardly possible. Higher qualities could be achieved with an SLA printer.
Base/Stand Depth:
- With this setting, a standing foot can be added to the image. Depending on the setting, a different thick base is created below the image. With an outer curve model, this is not necessary, as this can already stand on its own due to its shape.
Curve:
- This setting is only important if a flat Lithophane is selected. Then the exact desired diffraction can be set with this, but mostly this is also simply given by the outer curve model.
After all, settings have been set, the refresh should be pressed again on the model section and the finished STL file can be downloaded.
Convert STL-File to GCODE in Cura
In the last step, the finished STL file has been output to us. This is now ready to print and can be converted to a Gcode for printing with a program like Cura.
Since every printer is different, I can’t give you the perfect print data, only the parameters I used.
Important with Lithophanes is that the quality is strongly related to the layer height you set. From my experience, I know that I can set a layer height of 0.16mm with my 0.4mm Nozzle to get very good results.
Also, the infill should be set to 100% because gaps in the print will naturally let the light show through and change the image. To ensure a clean print of the infill, I set the number of outer walls to a high number (e.g. 10) to ensure that all lines are drawn the same and not suddenly in the middle part infill printed in a different direction.
Of course, the printing speed depends on the printer, but it is better to set it a little slower because Lithophanes are especially high precision to achieve the highest possible quality.
Below is a summary of the most important printing parameters:
- 0.16 mm layer height
- Number of outer walls: 10
- 100 % infill
Now it’s time to print the Lithophane, this is best done with PLA in white, I use the filiament from Geetech, which I can highly recommend.
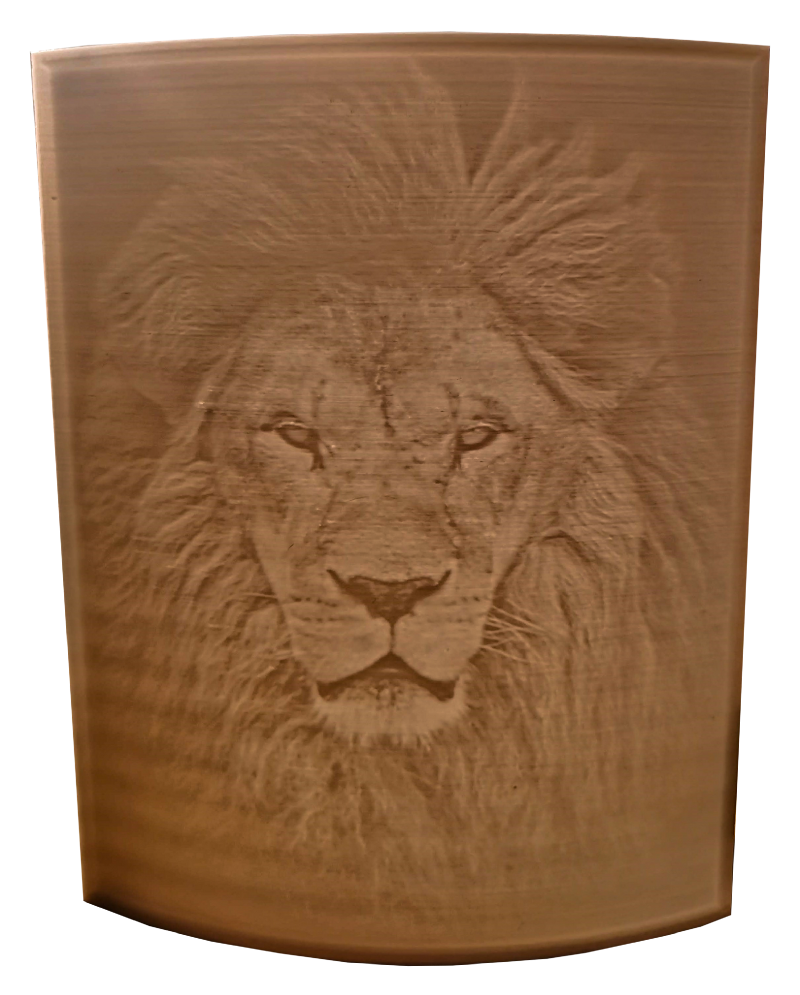
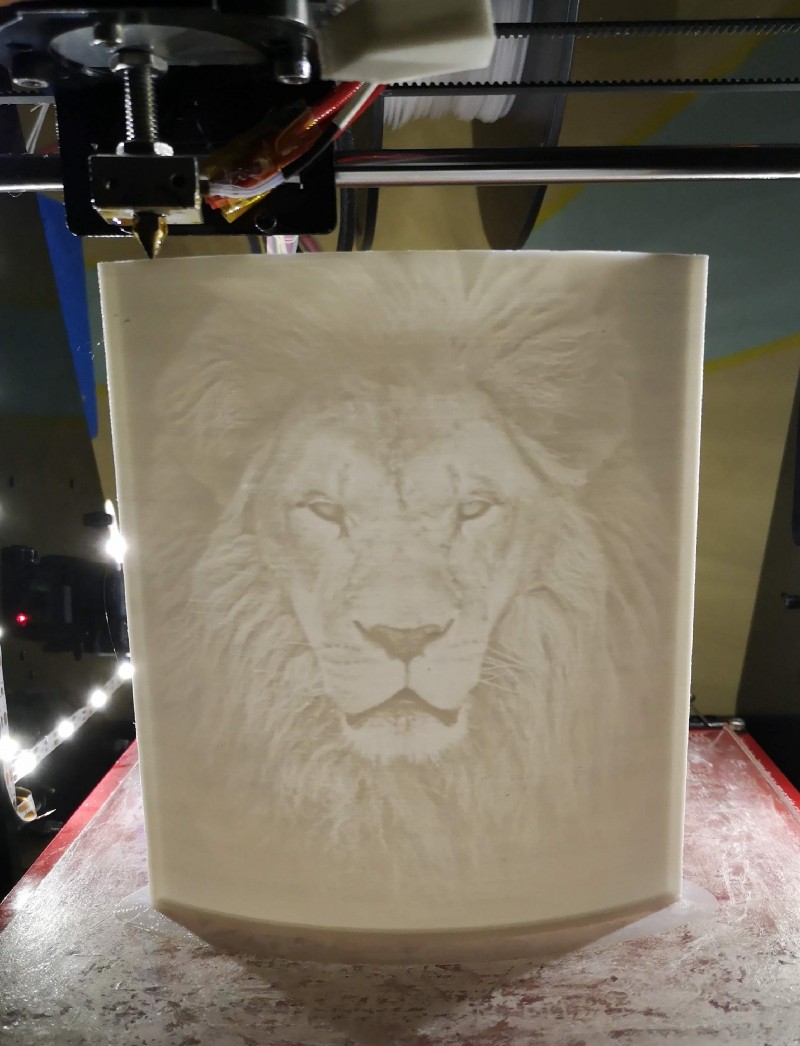
Result
Already during the printing, the peculiarity of a lithophane shows when you illuminate this from behind. Little by little, a finished image is created.
I hope you enjoyed this tutorial and wish you a lot of fun creating your own lithophanes.
If you want to read how I design and create a housing with backlight for Lithophanes and how to create a colorful Lithophane read my article “How to Create a Lithophane Housing with Integrated Lighting in Fusion 360” and “How to Create a Colorful Lithophane”
If you have any questions about this topic, feel free to contact me.
Schreibe einen Kommentar